
Interior cabinet finishing requires a lot of expertise and product awareness. It’s a time-honored way of upgrading cabinets. Our qualified experts, with experience and the right tools can make your old cabinets look fresh again. In this article, we’ll look at the fundamentals of refinishing and see if it’s a suitable option for your cabinets.
-
REMOVING THE OLD WOOD FINISH
The first step in the refinishing cabinets would be to strip the old coating. We clean and power-sand all surfaces to remove the finish and optimize adhesion. It will also remove all the residues that have eaten into the finish over the years.
You may wonder-how are they going to get into the contours of the door profiles for prepping? We’ve got tricks for this at Artistic Refinishing, but we can’t give away all of our secrets.
Our sanding process is the perfect way to end up with cabinets that will be time-tested and resistant to chipping. Who wants white cabinets that paint flakes off every time you touch them? Our method takes time and hard work, but it pays off, and we enjoy doing it.
The finish in your cabinets will decide what kind of stripper they require. They could need a more vigorous stripper for a more challenging mission, such as stripping industrial finishes or several layers of paint. It is a very necessary move and should be done by a qualified specialist to ensure that the new surface blends seamlessly into the wood.
- FILLING AND CAULKING
Open cracks and nail holes don’t look nice on finished cabinets. We remove holes on your cabinet boxes and trim molding to make it appear sturdy and filled when it’s done. Most times, there are nail holes in the new crown molding that didn’t pop up before, but we patch them too. We also check the doors throughout the process and cover any holes or blemishes that need to be repaired.
- PREPARING THE SURFACE FOR FINISHING
Before freshly stripped wood can be finished, some preparation work needs to be done. All surfaces must be cleaned with a solvent or furniture cleaner depending on the stripper used. It would also be important to polish the raw wood surfaces, to take care of any grain created during the stripping process and to remove any minor traces of old paint left behind. It would mean that the latest finish has a clean surface on which to coat.
- FINISHING THE WOOD
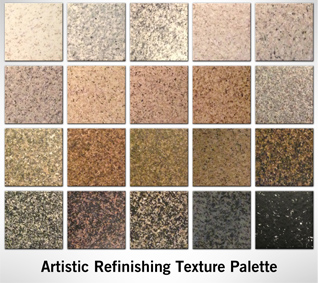
The next move is to add the finish. There are a lot of finishing options to choose from. Please refer to our gallery page to see many of the various varieties of finishes available. The most common method for cabinets is to stain wood with a wood stain accompanied by a clear lacquer. It would require multiple layers of lacquer to produce a top quality finish regardless of the type of finish you select. It is therefore important to sand gently between the lacquer coats to ensure that the surface is well adhered to. The process is the same for cabinet doors, just as with cabinet boxes.
WE USE QUALITY CABINET GRADE PRODUCTS
Trust Artistic Refinishing to use top-quality, industry-leading materials to achieve the long-lasting, durable and rich-looking finish while being considerably lower in odor and VOC content than comparable coatings. We’re watching, looking out for the future of your cabinetry. Another benefit of our company is that over time our white coatings do not turn yellow. Many paint materials used by professionals will change color, leaving you unable to handle a little cling that might occur, and even worse, your white cabinets are no longer white!
These are the little details that matter until the project is finished. When you schedule your project with Artistic Refinishing, you can rely on us being there and completing the work when we say we will. We do not play balancing games with our scheduling; We are committed to you when you commit to us.